
Register as a caregiver:
The first time you open the application, you will be taken to the login screen as seen below. If you haven't already registered your own caregiver account, press "Sign up".
You will then be asked to enter your e-mail address and username together with your password. Then press "Sign up".

You will now be greeted with a welcome screen. Press "Get started". The next screen prompt you for your first and last name. Fill out the input fields. Then press "Next"

The next screen asks for your phone number. This is optional but is recommended to make communication between caregivers more effective. If you want to enter your phone number, fill in the field and press "Next". If you don't want to fill it out, press "Skip" at the bottom of the screen.
The screen that now appears asks you to either create an account for the care recipient or send a request to be connected with an already existing account for a care recipient. You can skip this step if you don't have the username of the care recipient you want to connect to.


Register a care recipient:
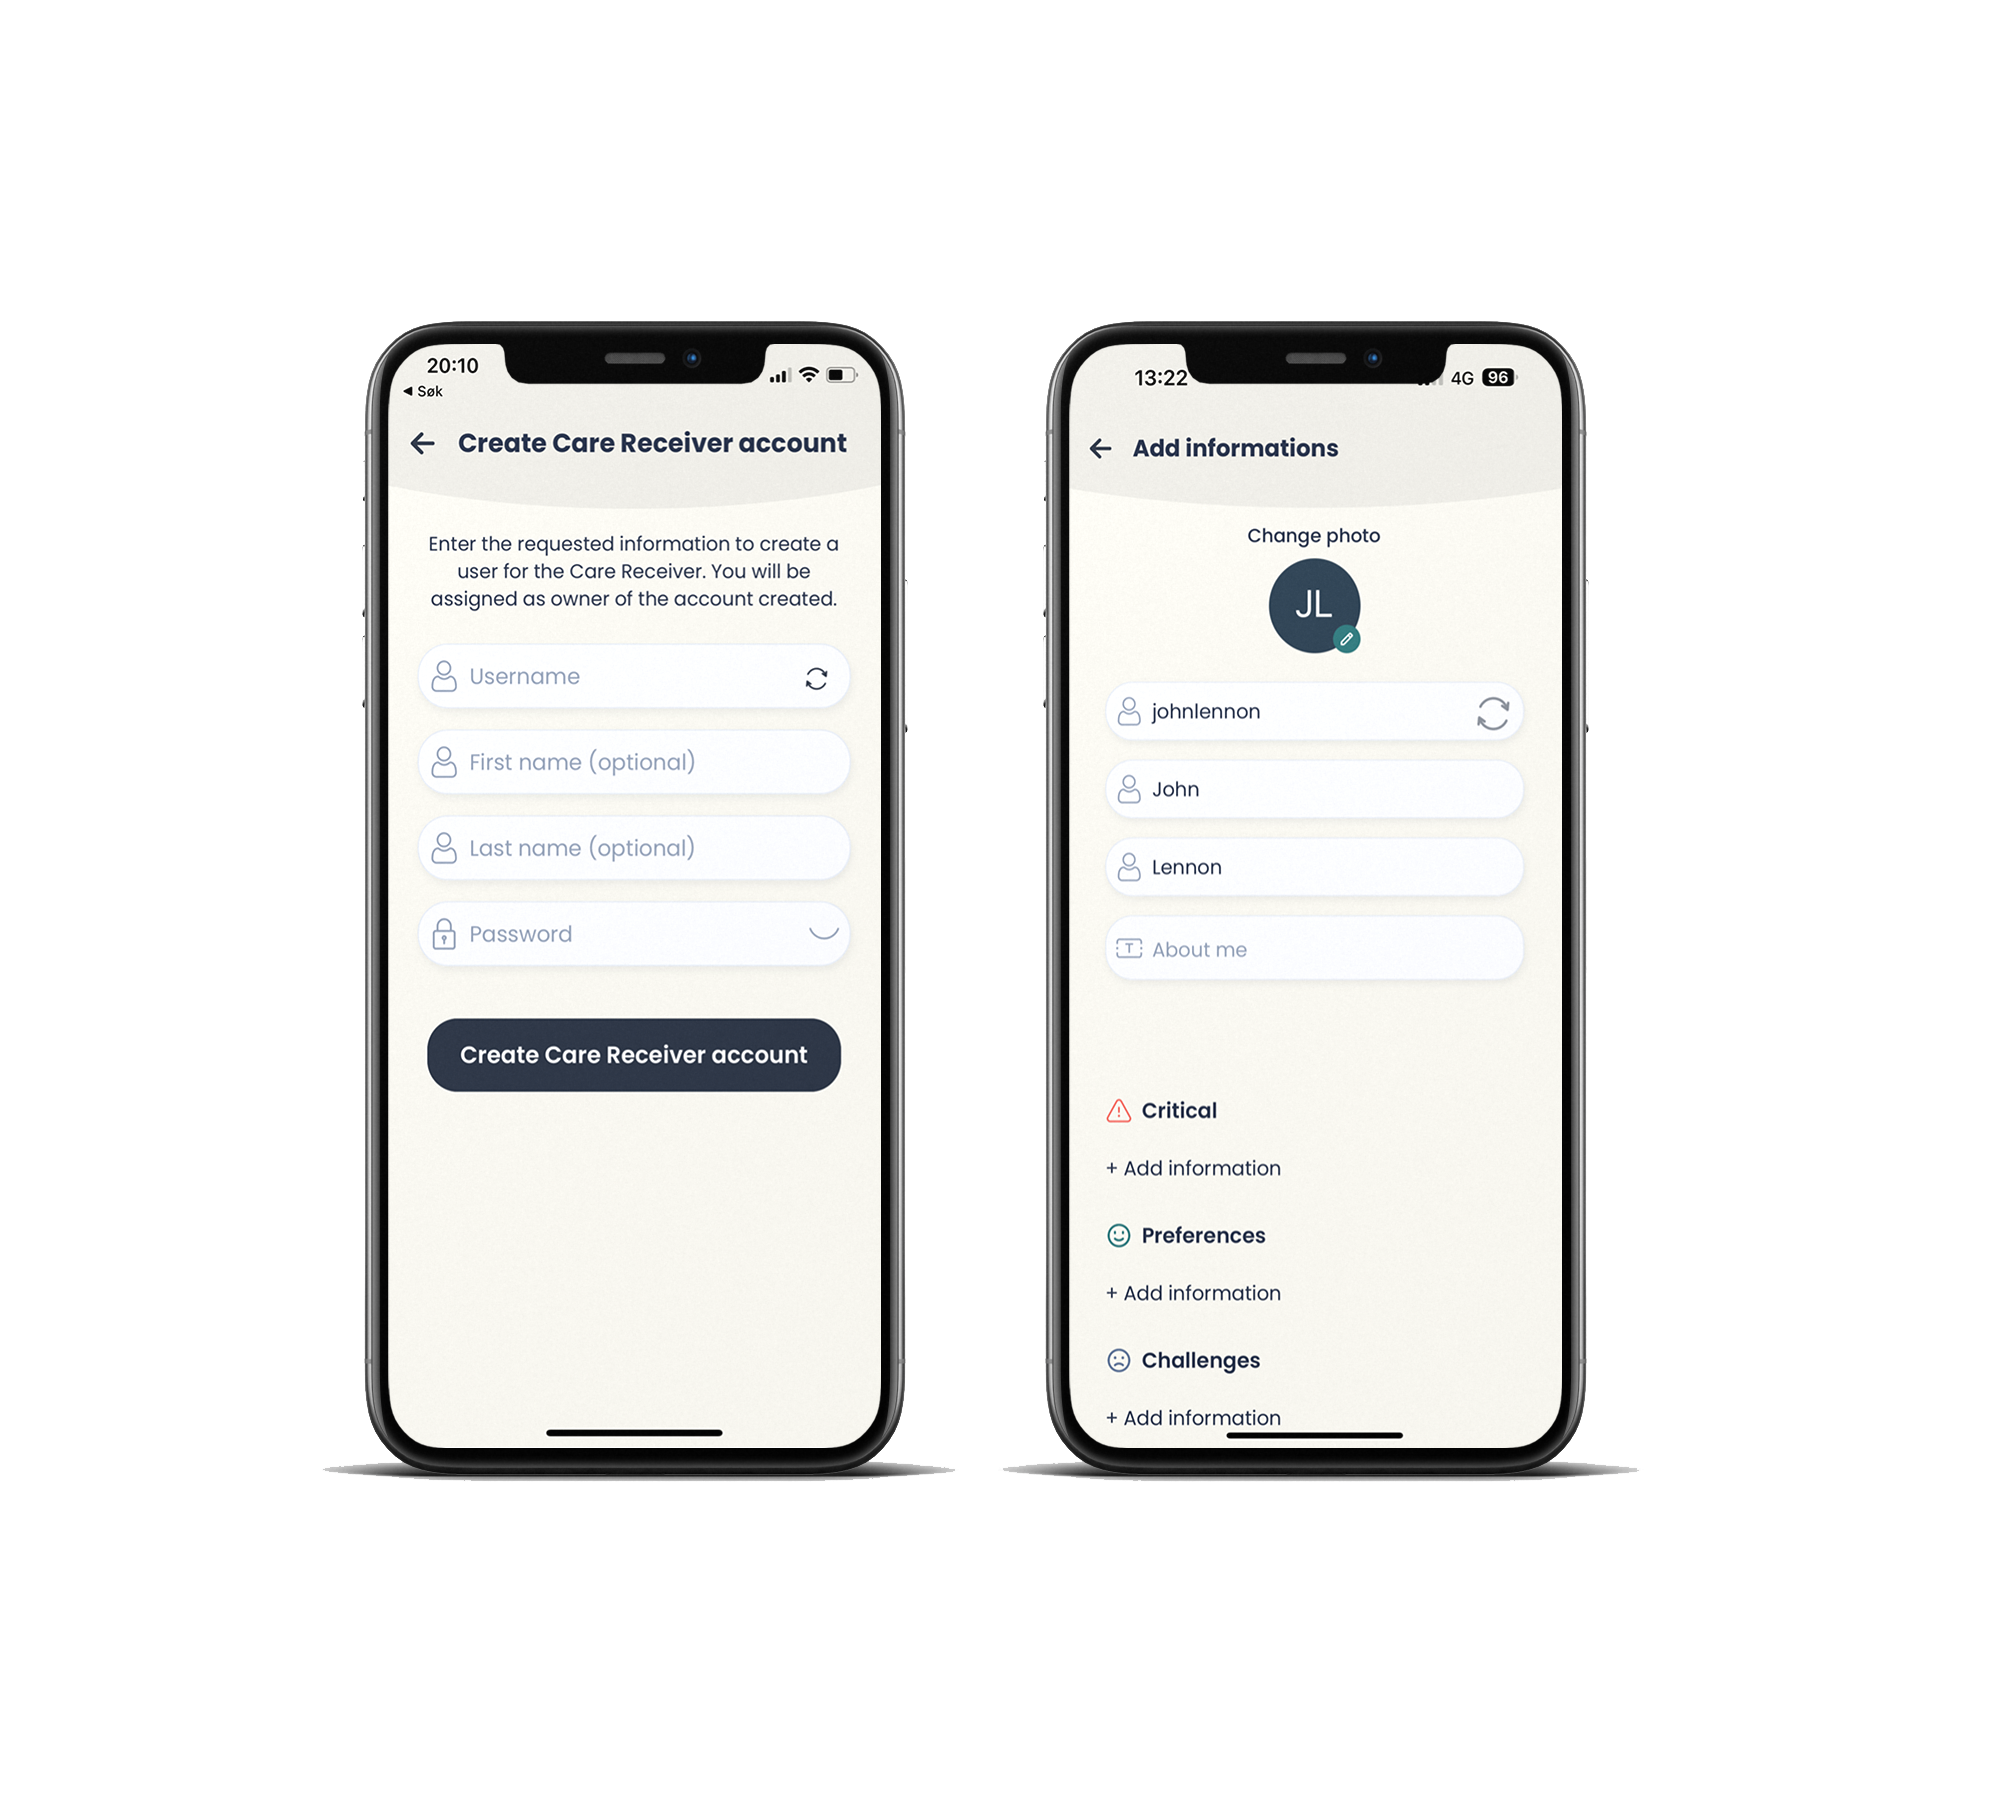
The screen below and to the left shows the registration form for creating a new care recipient. Here, "Username" is required as this is the unique identifier when connecting to caregivers. First name and last name are optional, as there may be a desire to anonymize the care recipient. Also, enter a password that can be used if the care recipient is to log in to one of Pletly's applications in the future.
We recommend adding relevant information about the care recipient as soon as possible, and you will be asked if you want to add that information now or if you want to skip it. When pressing “Add information”, you will be shown the screen below and to the right. Here you can add general information about the care recipient, but also information that is regarded as critical. When you are done, press the “Save” button at the end of the screen. (You can edit and update this information from inside the Pletly Pal app anytime you want.)
Connecting care recipients to caregivers:
In Pletly, there is always one caregiver who is considered the owner of the care recipient account. This is the caregiver who created the care recipient's account and is usually a parent or family member. This caregiver is the only caregiver who can administrate who is connected to the care recipient and who has access to the care recipient's information.
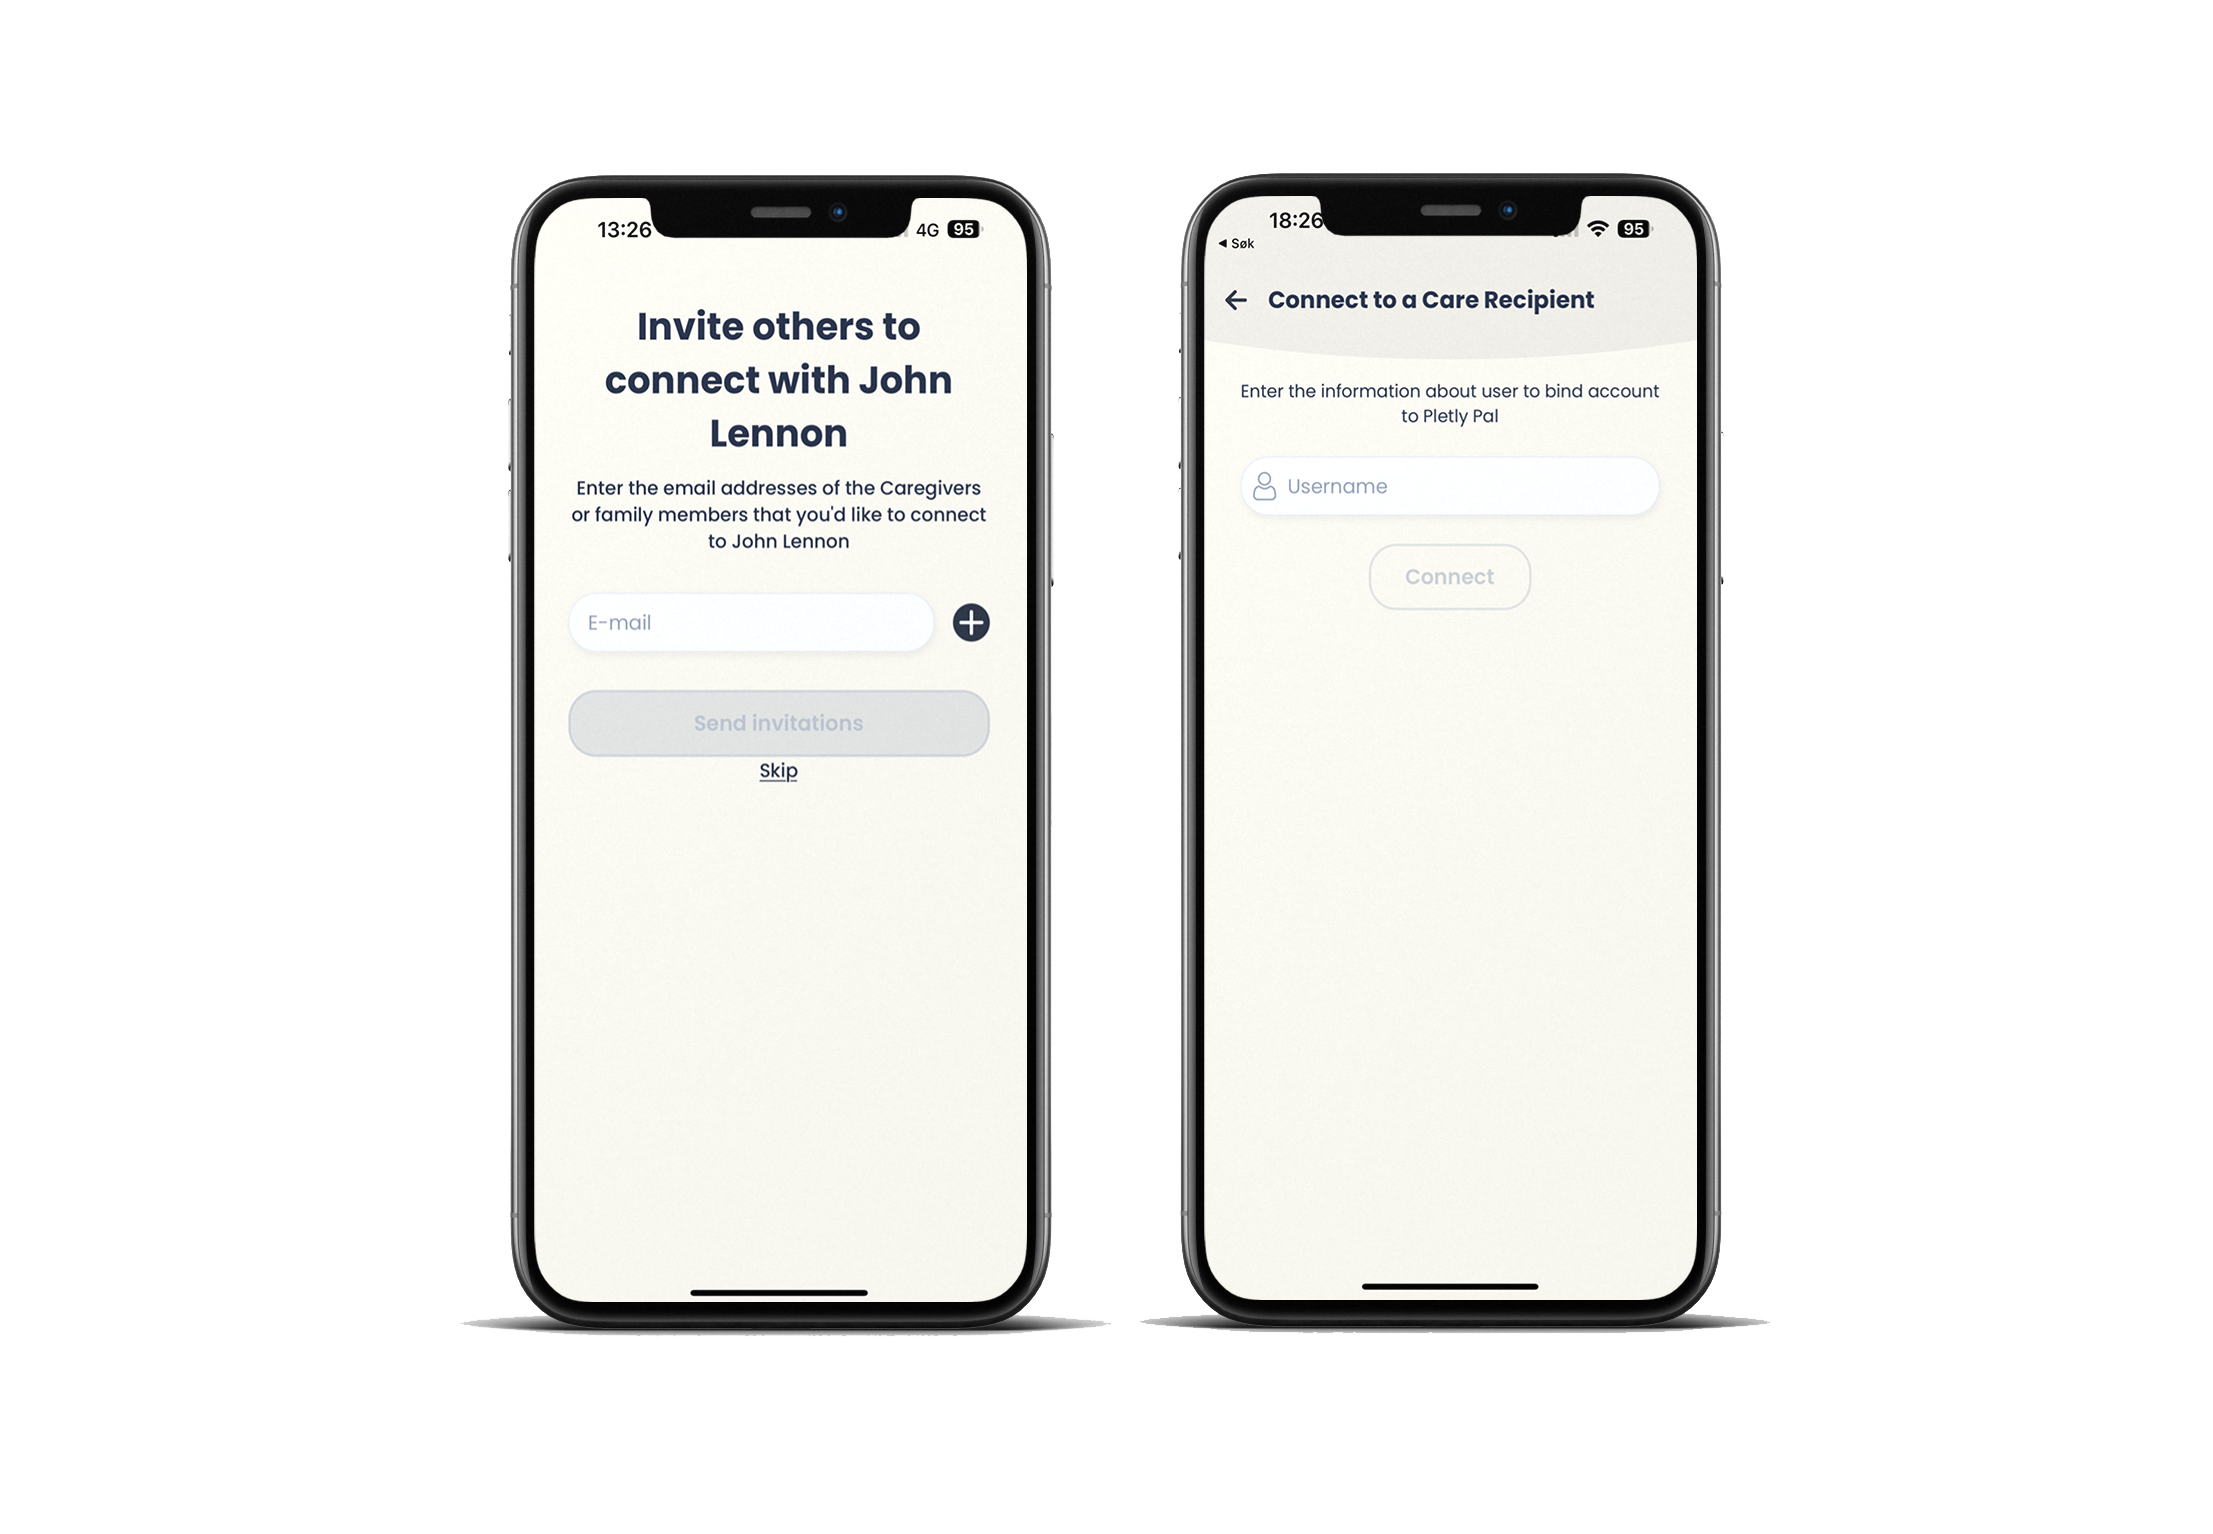
Connecting caregivers and care recipients can be done as a part of the registration process where you can invite caregivers to connect to the care recipient's account, or you can, as a caregiver wanting to connect to a specific care recipient, do this from inside the application. The screen below and to the left shows where you can invite caregivers to connect. Enter the e-mail address of the caregiver, and if they are not a Pletly user, they will receive an invitation to download and register in the app. If they register with the same e-mail address as the received invitation, they will automatically be connected when they have registered their caregiver account.
If you don't send a connection request to a care recipient during the registration process, it is possible to do so from the social feed as seen below and to the left, or through “My connections”.
If you are connected to one or more care recipient, posts with information about this care recipient will be visible in the social feed.

Key Functionalities:
Social feed
This feature should be familiar to those who have used Instagram or Facebook before. Posts, photos, and videos from the care recipient's life or relevant to the care of the care recipient will be displayed here.
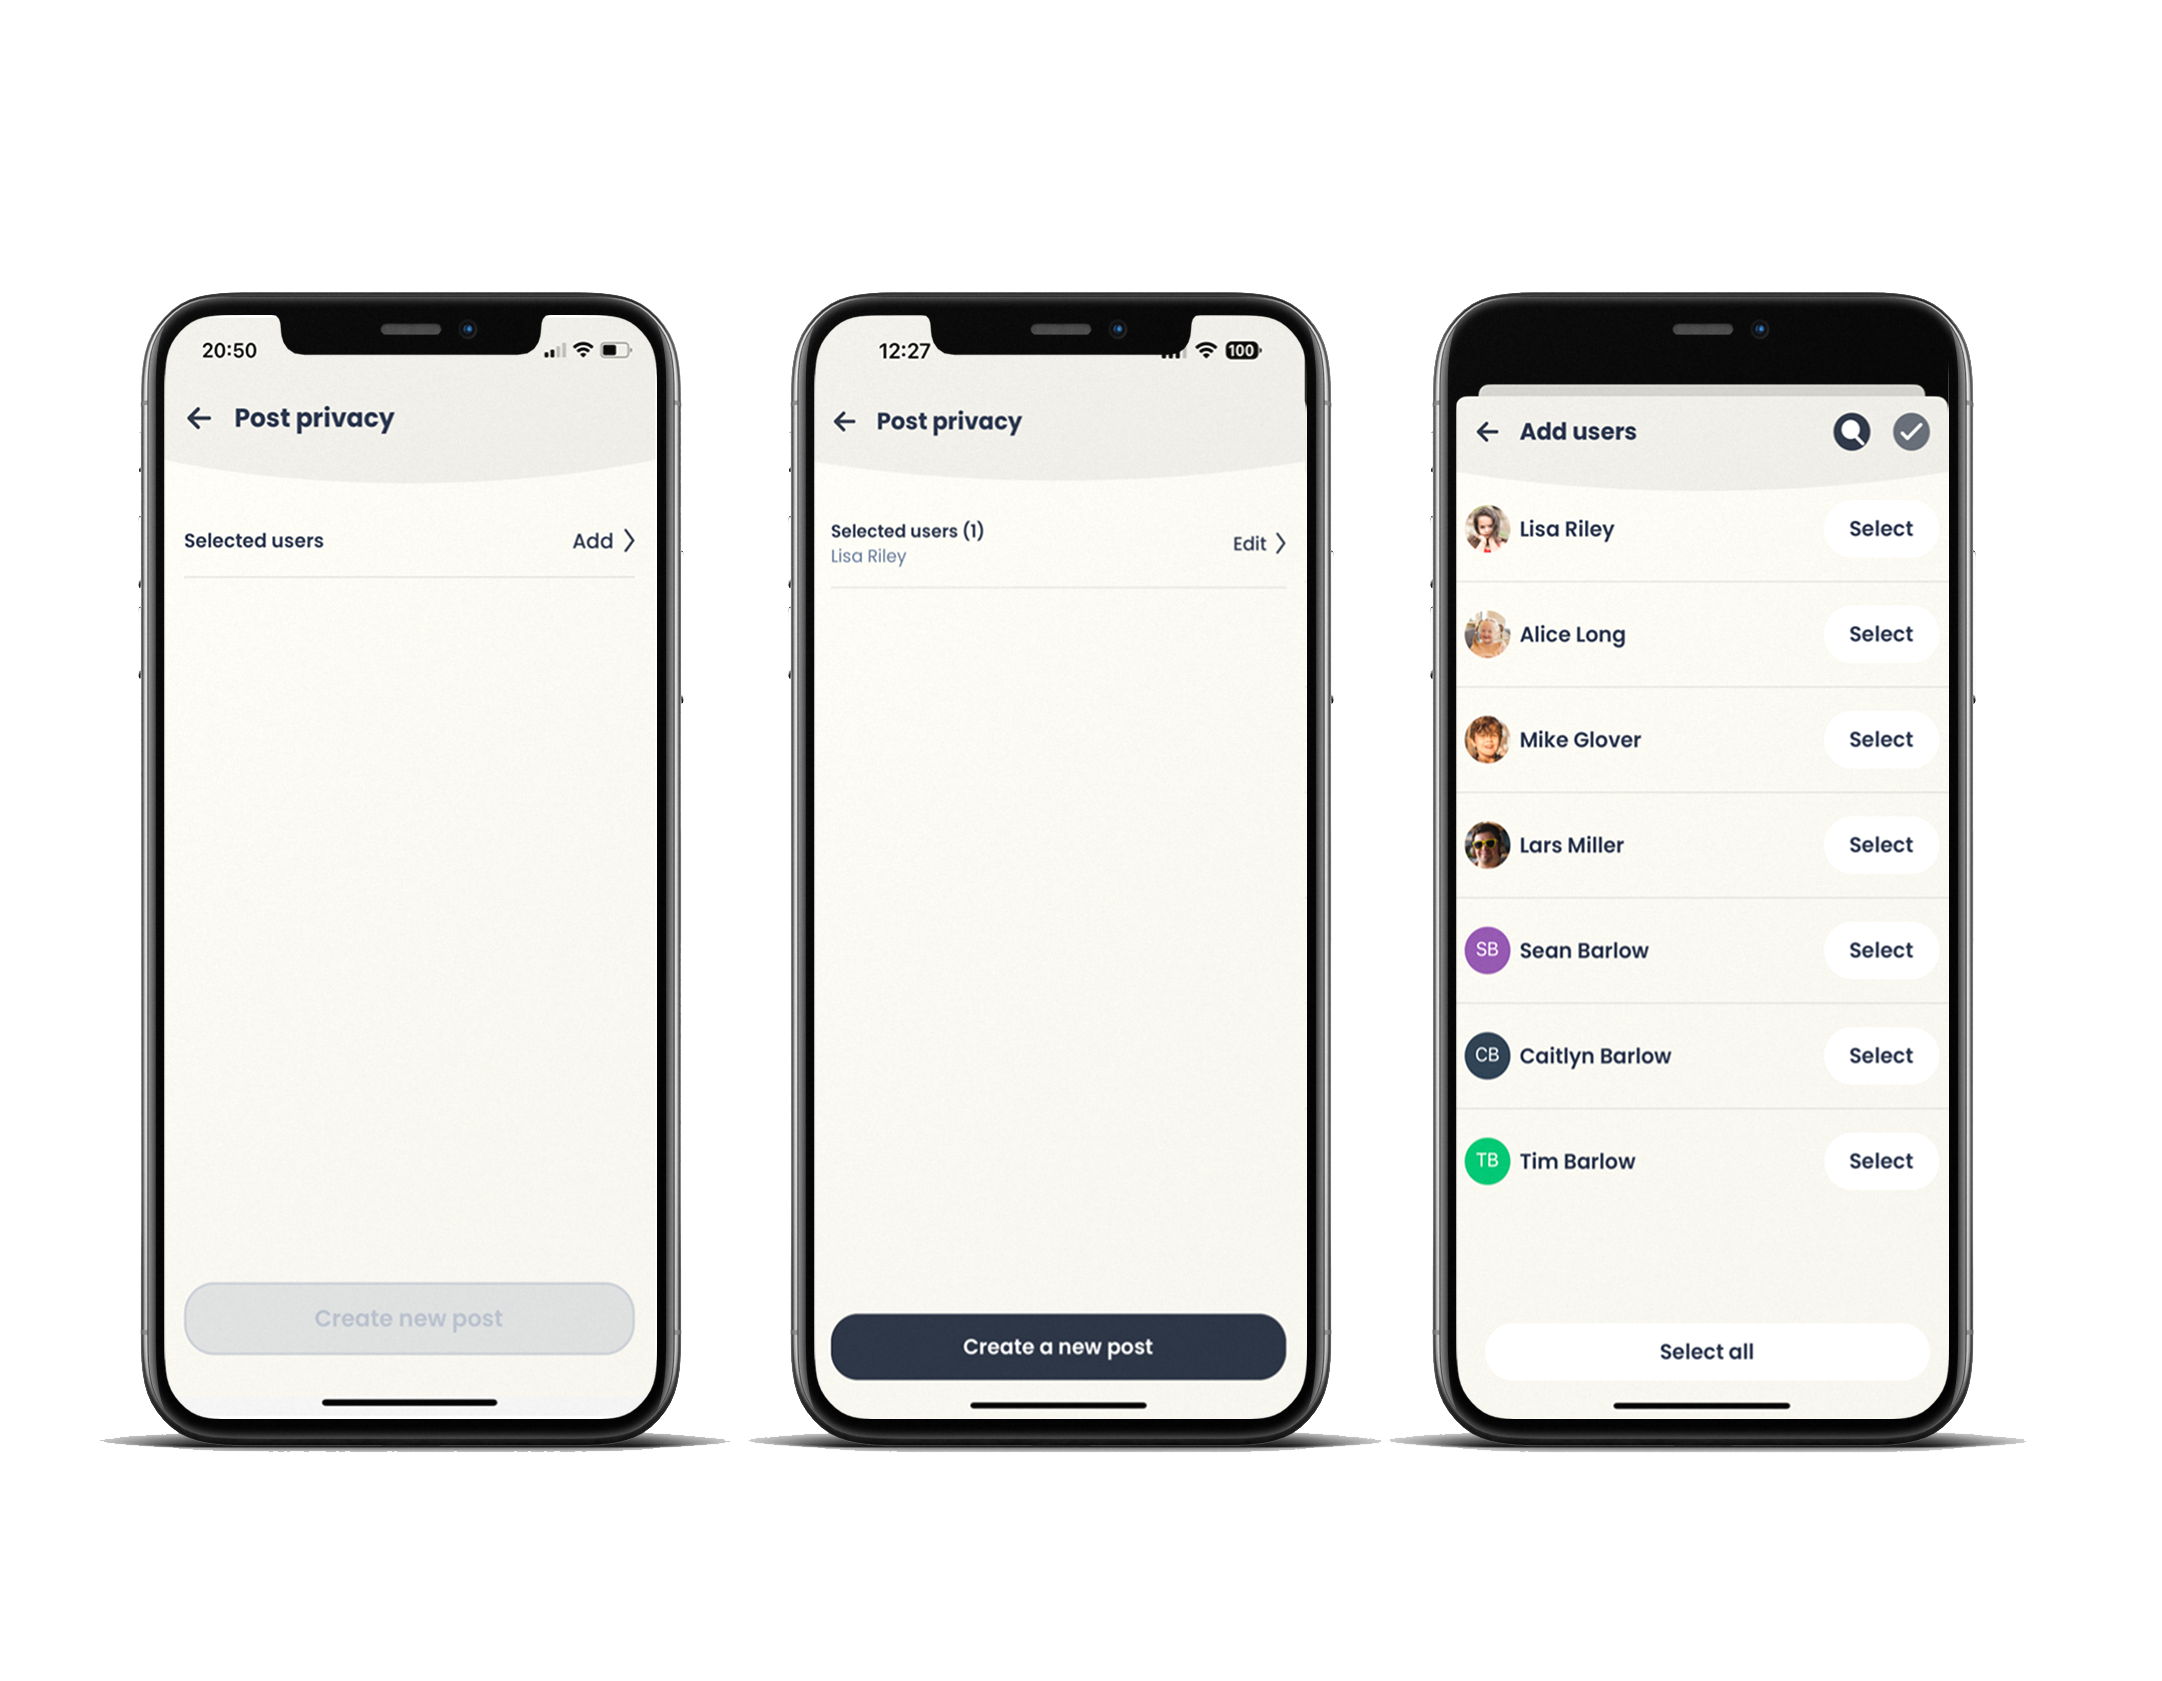
To publish a new post, press the plus icon at the bottom right on the screen. You will then be routed to the screen shown below on the left. You can publish plain text posts, or you can add images or video. To attach a photo or video to the post, tap the large white area with a plus sign in it. When you are ready to publish a post, press the checkmark in the top right corner.

If you are connected to more than one care recipient, Pletly is designed so that you can choose which care recipient's social feed your post should appear on. An example could be that a picture has been taken of Lars Miller and Alice Long in interaction and you want both their connected caregivers to be able to see the post. Then you must choose both Lars Miller and Alice Long. If you only have one care recipient, e.g., Lars Miller, then Lars Miller is chosen by default, and you don't have to pay attention to this.
When at least one care recipient has been selected, either by default or manually, you press "Create new post" and the post will be published on the selected care recipient's social feed.
Profile / Information Library:
Each individual care recipient has their own profile page with general information about the care recipient, as well as three designated areas for critical information, their preferences, and challenges. To edit or add information to the profile, press the pencil icon at the top right of the profile.
To find the care recipient's profile page, press the icon with two avatars in the bottom bar. Alternatively, you can press the magnifying glass icon and manually search for the user.

It might be necessary to communicate much more information than what fits under the profile page mentioned above. Pletly therefore has its own functionality called the Information Library. This could be useful for showing sign language or other communication forms that non-verbal care recipients use, how to perform specific routines, etc. Here you can create your own folder structure to organize the information as you see fit, and you can add plain text, images, and video. Just as with regular posts in the social feed. The folder structure can have two levels: folder and subfolder. In the pictures below, you can see an example of Lars Miller's Information Library.

A video has been made that goes through the Information Library and its functionalities. It is available here:
Chat:
It is possible to chat directly between caregivers inside Pletly Pal. Both one-to-one, but also in a group chat. This can be internal communication between caregivers at the residential facility, school or between staff and parents. Chat supports images and video.
To go to your messages, press the chat icon at the top of the main screen. Here you will find a list of your conversations as well as the option to start a new chat. At the top right, you can choose between starting a group or one-to-one chat. You can also start a chat by searching for the name of a caregiver and pressing "Chat" via their profile.
